
Easy Homemade Diabetic Bread
Ingredients:
For the Bread Dough:
- 350g (2¾ cups / 12.3 oz) wheat flour, sieved
- 1 teaspoon (5g) salt, or to taste
- 5g (1¾ teaspoons) active dry yeast
- 210ml (¾ cup + 2 tablespoons / 7 fl oz) boiled water, cooled to lukewarm
- 30ml (2 tablespoons / 1 fl oz) vegetable oil
- Additional flour for dusting
For Finishing:
- 2-3 tablespoons whole milk for brushing
- 1 tablespoon (15g) unsalted butter, melted
- Extra flour for dusting work surface
Instructions:
Preparing the Yeast Mixture
- Begin by ensuring your boiled water has cooled to lukewarm temperature, approximately 37-40°C (98-104°F). Water that’s too hot will kill the yeast, while water that’s too cool won’t activate it properly. Test the temperature by dropping a small amount on your wrist – it should feel comfortably warm, not hot.
- In a small bowl, combine the lukewarm water with the sugar and stir until dissolved. Sprinkle the dry yeast over the surface and let it sit for 3-5 minutes until it becomes frothy and bubbly. This proofing step confirms that your yeast is active and will help your bread rise properly.
Creating the Dough
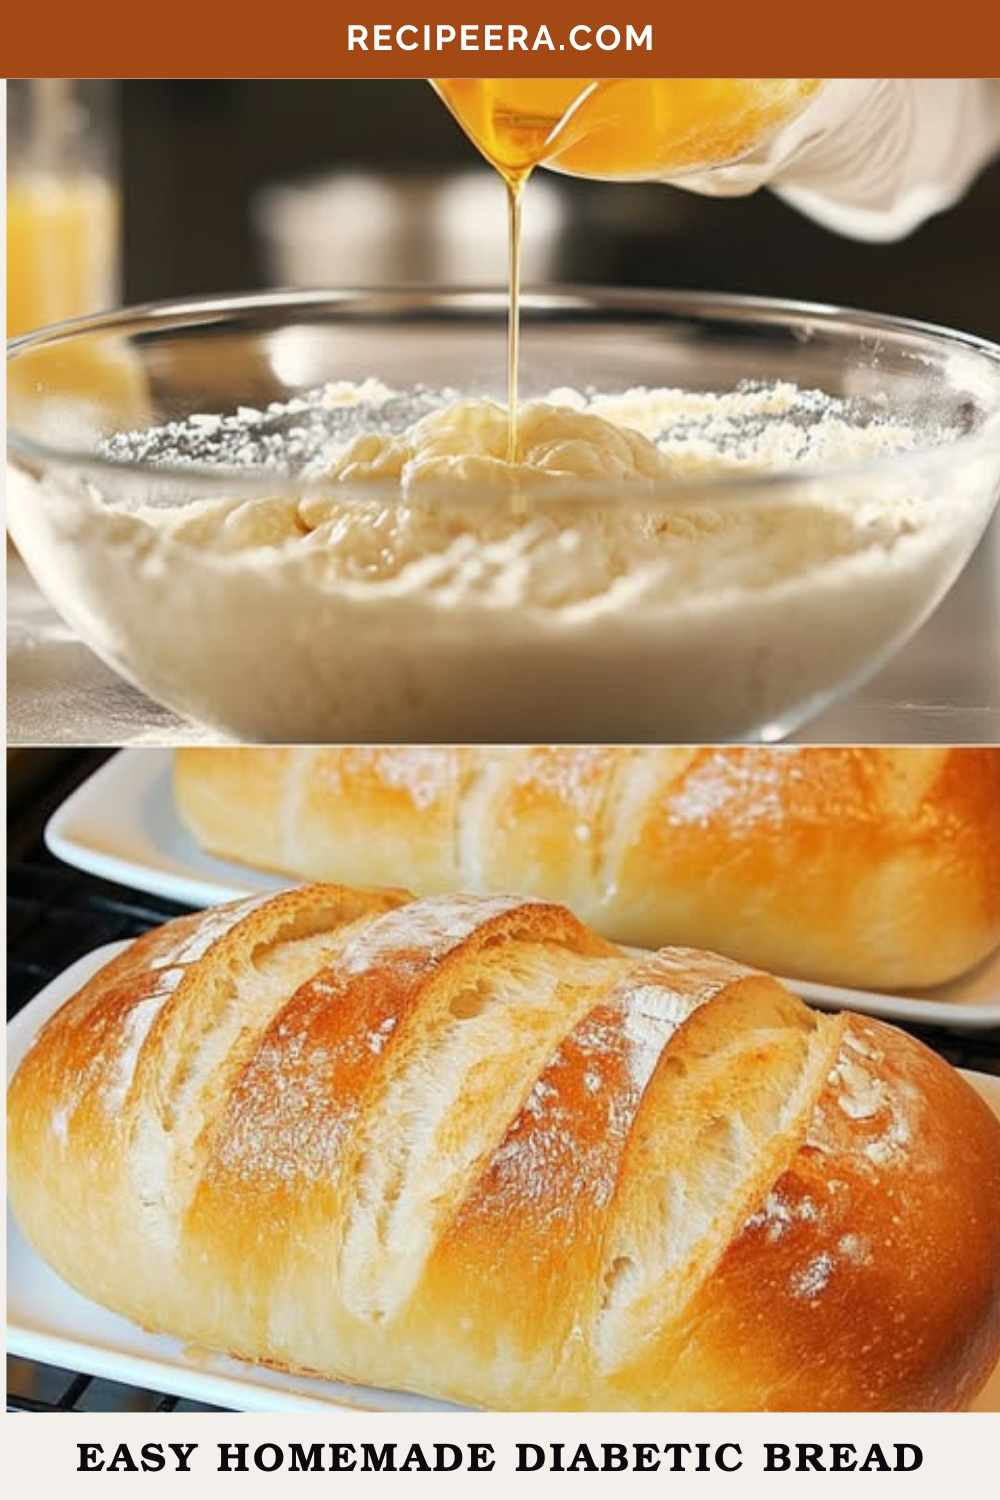
- In a large mixing bowl, combine the sieved wheat flour and salt, whisking them together to ensure even distribution. Create a well in the center of the flour mixture and pour in the activated yeast mixture along with the vegetable oil.
- Using a wooden spoon or your hands, mix the ingredients together until they form a cohesive dough. The mixture will initially appear shaggy but will come together as you continue mixing. Once the dough holds together, turn it out onto a lightly floured surface.
Kneading and Shaping
- Knead the dough for 3-4 minutes until it becomes smooth and elastic. The dough should be soft but not sticky – if it sticks to your hands, dust with a small amount of flour. The quick kneading time is sufficient due to the optimized flour-to-liquid ratio and the active yeast.
- Shape the dough into an oval loaf by gently stretching and folding it under itself. Place the shaped loaf on a parchment-lined baking sheet, seam side down. Using a sharp knife or razor blade, make 4-5 diagonal cuts across the top of the loaf, approximately 1cm (½ inch) deep. These cuts will create the characteristic scored pattern and allow the bread to expand properly during baking.
Final Rise and Preparation
- Cover the shaped loaf with a clean kitchen towel and let it rise in a warm, draft-free location for 15-20 minutes. The bread should increase in size by about 50% during this brief rising period.
- While the bread rises, preheat your oven to 220°C (425°F). Place an empty metal pan on the bottom rack of the oven – this will be used to create steam for a crispy crust.
Baking Process
- Just before baking, brush the top of the loaf gently with milk using a pastry brush. This will give the bread a beautiful golden color and soft texture on the surface. Dust lightly with flour for an authentic artisan appearance.
- Carefully transfer the baking sheet to the middle rack of the preheated oven. Immediately pour 1 cup of hot water into the empty pan on the bottom rack to create steam, then quickly close the oven door. This steam helps develop a crispy, professional-quality crust.
- Bake for 25-30 minutes until the bread is golden brown and sounds hollow when tapped on the bottom. The internal temperature should reach 190°C (375°F) when measured with a digital thermometer.
Finishing and Cooling
- Remove the bread from the oven and immediately brush the hot surface with melted butter. This adds flavor and keeps the crust from becoming too hard as it cools. Transfer the bread to a wire cooling rack and allow it to cool for at least 15 minutes before slicing.
- The bread is best enjoyed warm but can be stored at room temperature for up to 3 days when properly wrapped.
Pages: 1 2


What type of sugar and how much. It is not listed in the recipe.
Hi I haven’t try it as yet but I believe you can use , stevia, monk fruit these sugars are best use for diabetic n there recipes, u should be able to find them in health store or online.